


Intro
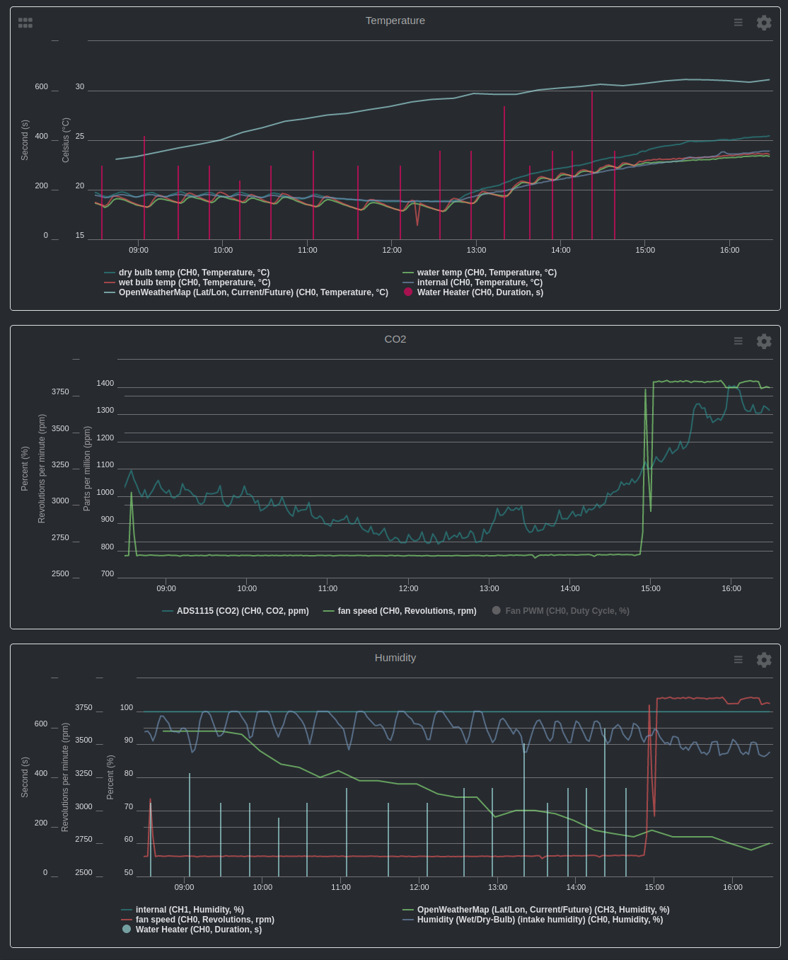
Mushrooms require tightly controlled environments for maximal production.
Software
This controller is based on the Raspberry Pi Zero W (wireless). It is an old design and soon to be retired, but it is still a great base. It has python support, GPIO (no analog), and wifi.
edit Just three days ago the raspberry pi org announced the Zero 2 W!. I guess I won’t have to worry about finding an alternative platform after all… and it is already sold out.
Basically, we need a Raspian OS Lite headless install with a static IP, ssh, and Mycodo.
Setup
Download the latest version of Raspian OS Lite from the raspberry pi website. We want the lite version to avoid any extra software that they Zero can’t handle. Write the disk image to a SD card.
We are running headless, with the only access coming from mycodo through https. So we need to enable headless start, with a static IP, and ssh access.
Follow the directions for a headless setup.
In short, mount the boot partition and create a file called wpa_supplicant.conf with your wifi credentials and country code.
ctrl_interface=DIR=/var/run/wpa_supplicant GROUP=netdev
country=US
update_config=1

network={
 ssid="I'M MR WIFI LOOK AT ME!"
 psk="whatsthewifipassword"
}
Similarly, mount the rootfs partition and edit the /etc/dhcpcd.conf file. Modify the example static config to match your network settings. Make sure to change the interface name to wlan0 instead of the default eth0 that the non-wifi Raspberry Pis use.
If for some reason this doesn’t work, find the DHCP address manually and change it via ssh.
SSH is not enabled by default. Place a file called ssh (no extension) in the boot partition. E.g. sudo touch /media/user/boot/ssh. more info
Start your Zero. This will take 5-10 minutes for the first boot.
The first login credentials are
user: pi
password: raspberry
You can copy your ssh credentials from your computer to the pi using ssh-copy-id <USERNAME>@<IP-ADDRESS>.
After you have successfully established a connection, you can remove password authentication and change the ssh port for better security.
sudo nano /etc/ssh/sshd_config
Change:
...
Port 666
...
PasswordAuthentication no
...
Change your default password to something more secure: passwd. I suggest using a password manager.
Change your localisation options using sudo raspi-config and activate any interfaces you need (probably I2C, SPI, and 1-wire). Expand your SD card at the same time in the advanced sections. You can set the GPU memory to the lowest available option.
The update your pi sudo apt update && sudo apt upgrade -y and then reboot.
Log in using the new port. You can also do a dist upgrade sudo apt dist-upgrade if you used an old raspian os image for whatever reason.
Then install mycodo:
curl -L https://kizniche.github.io/Mycodo/install | bashThis will take upwards of 45 minutes to finish.
Components
Internal
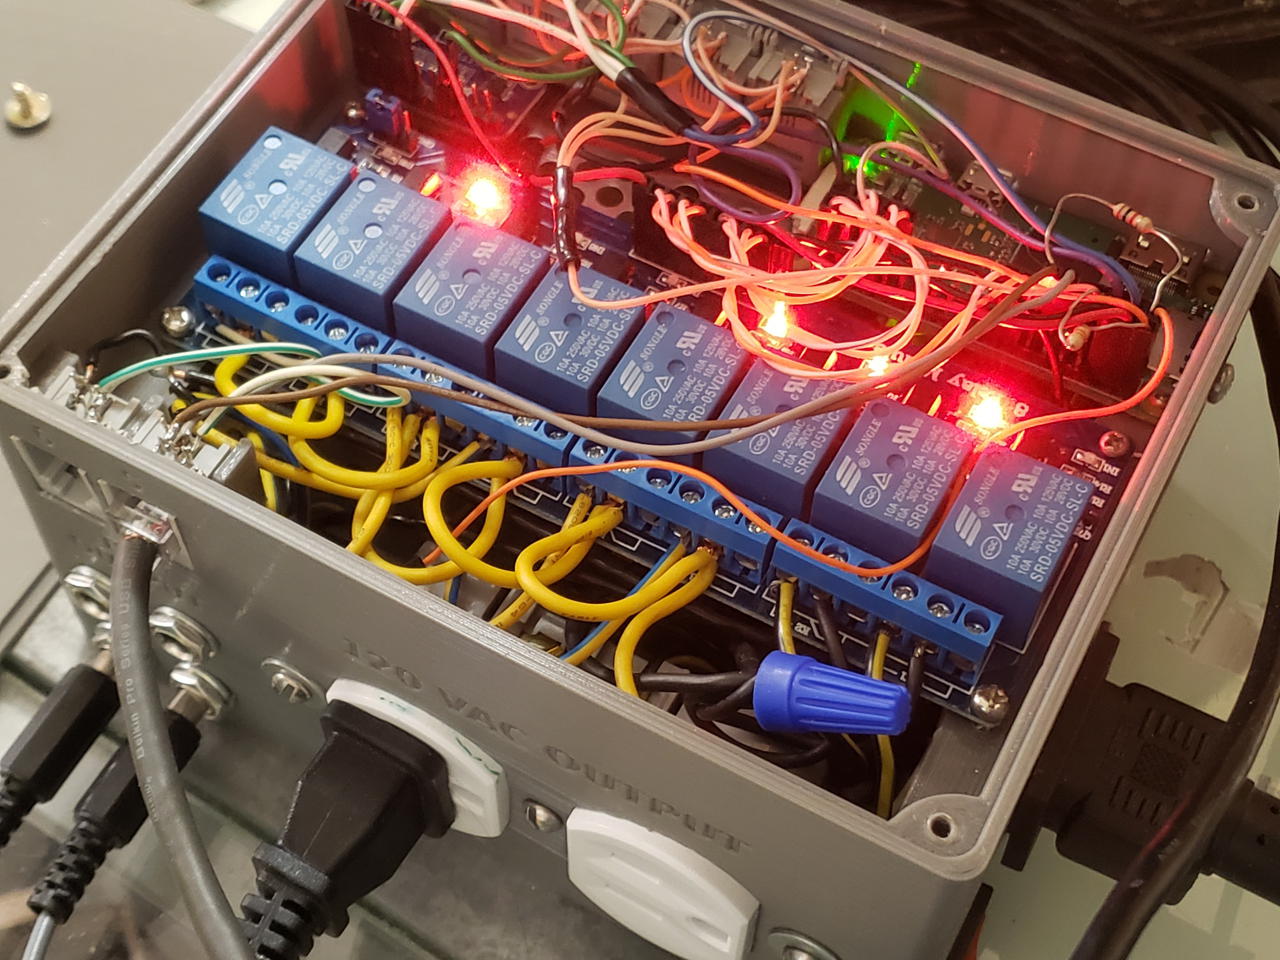
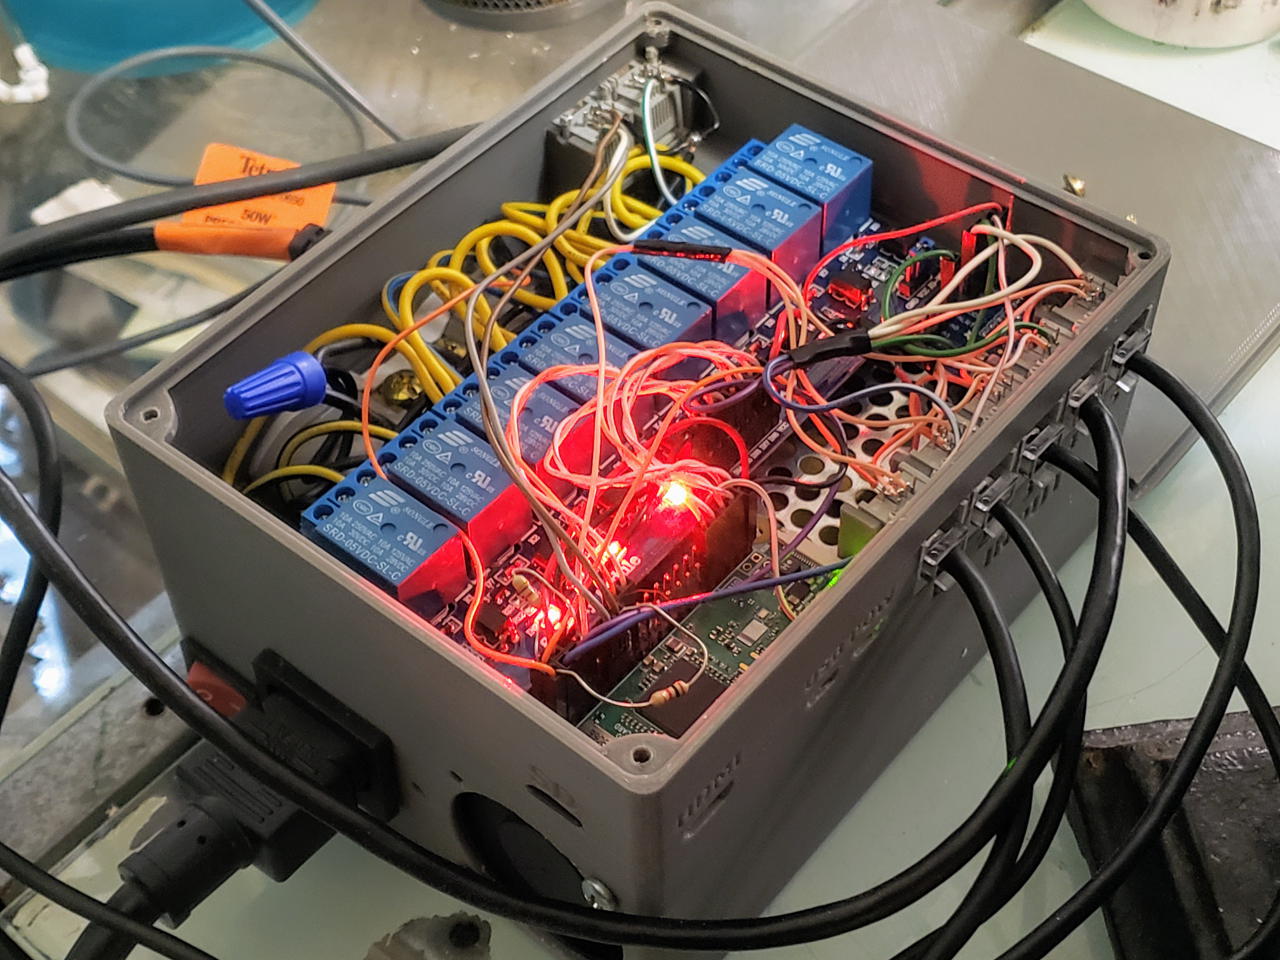
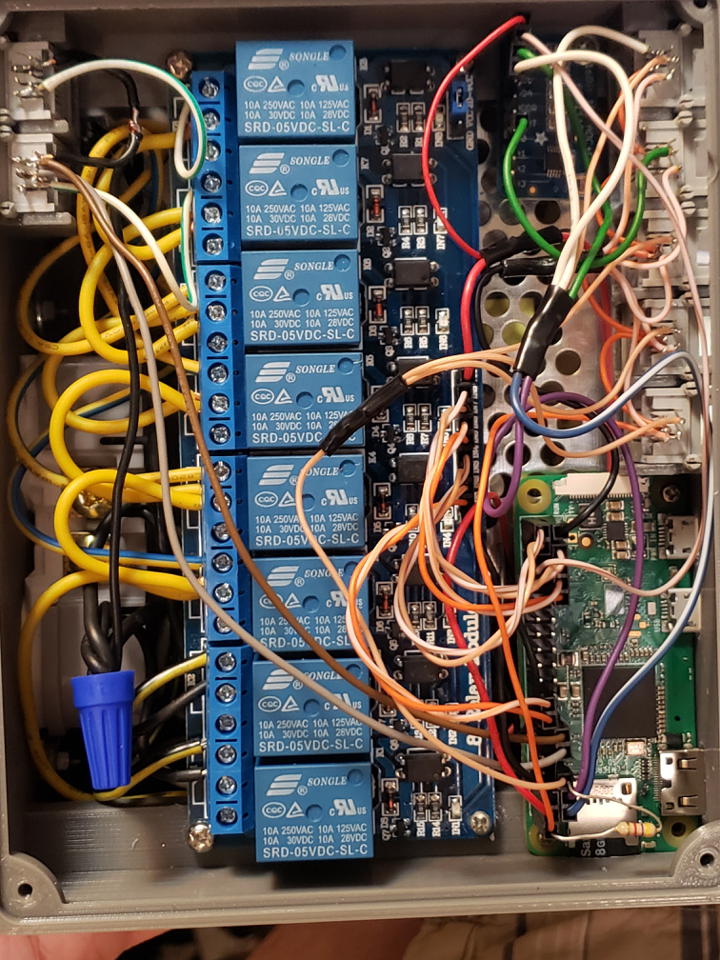
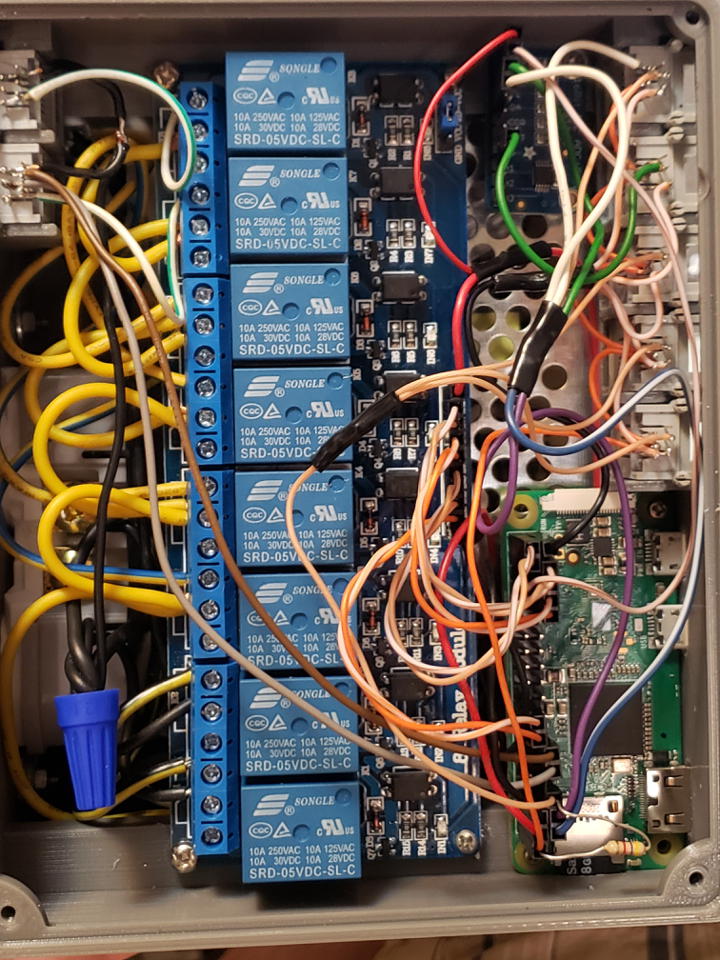
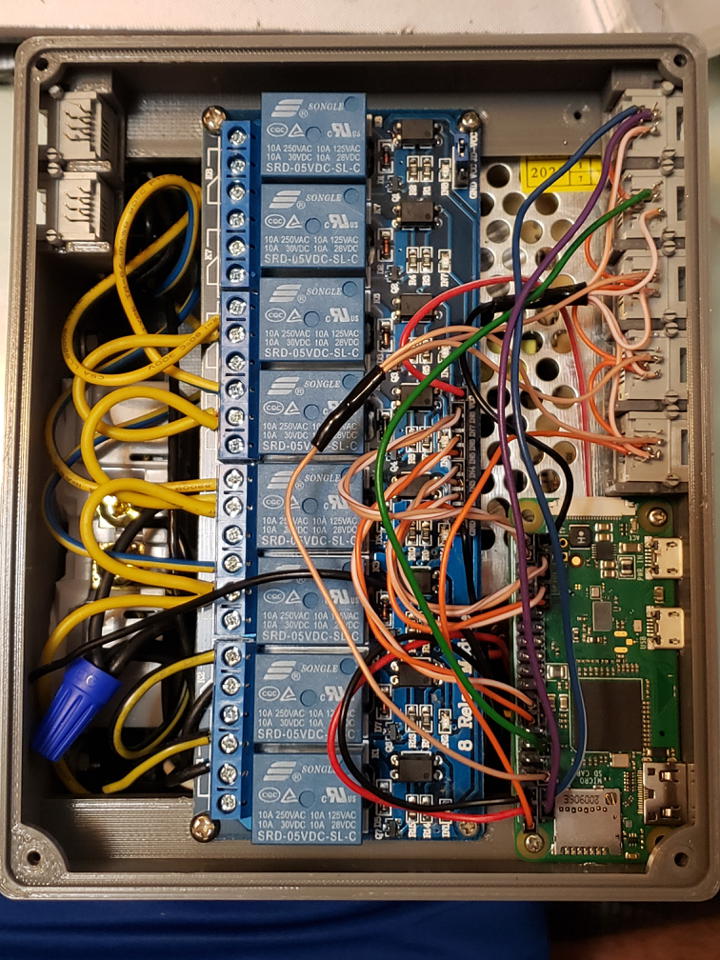
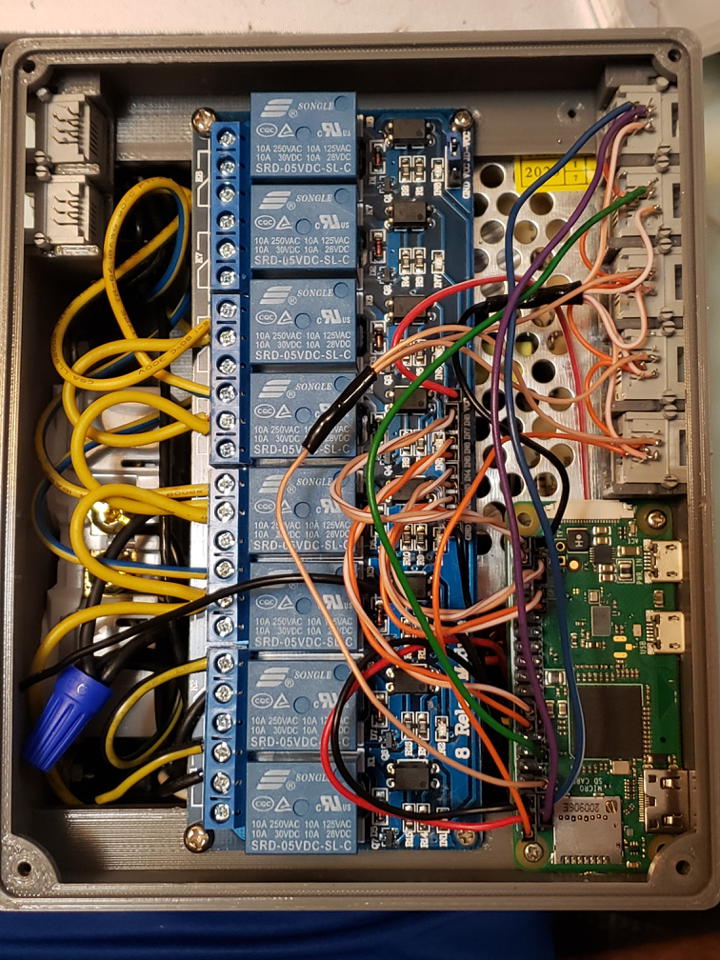
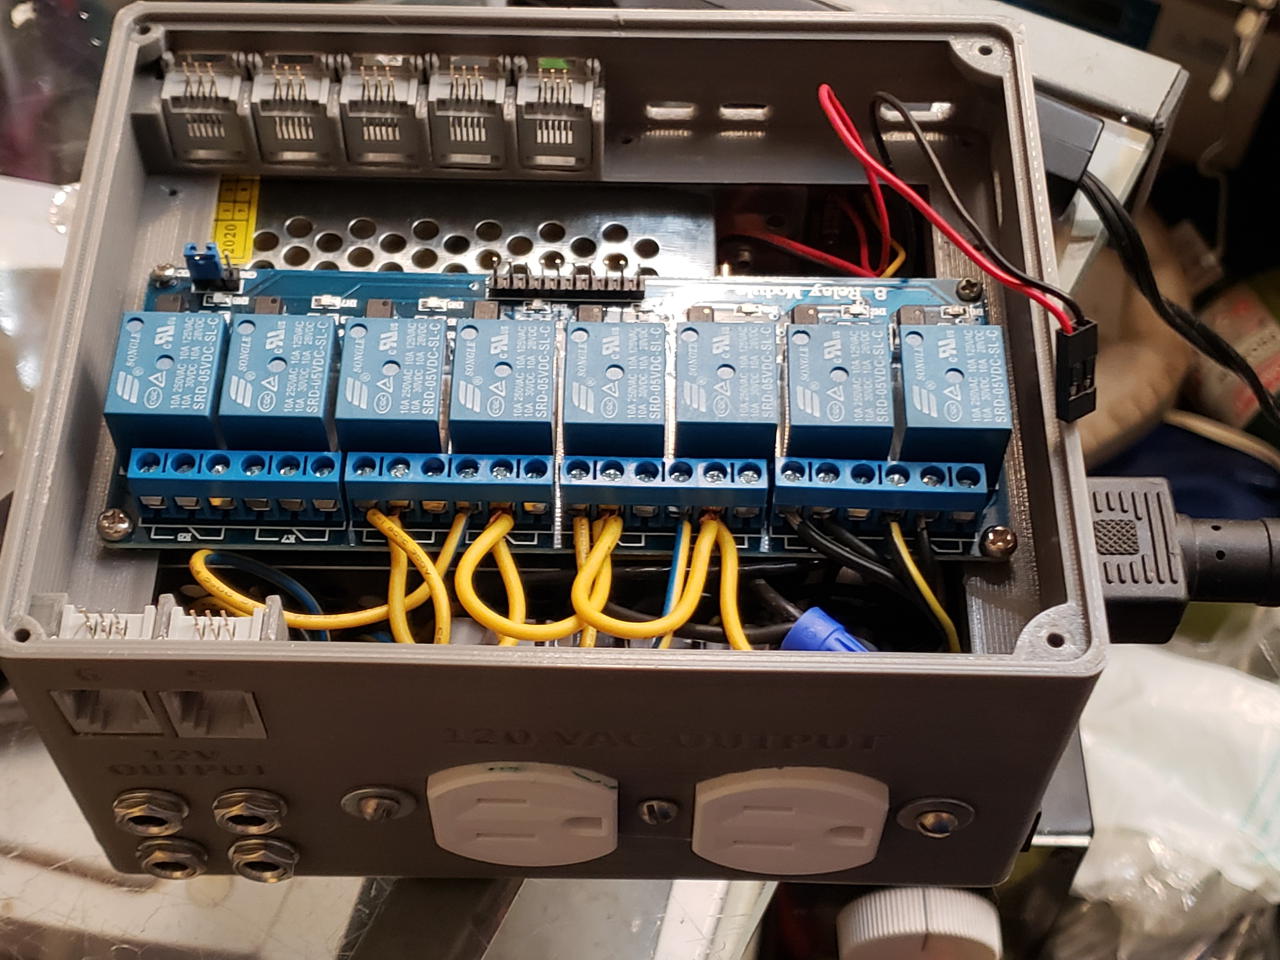
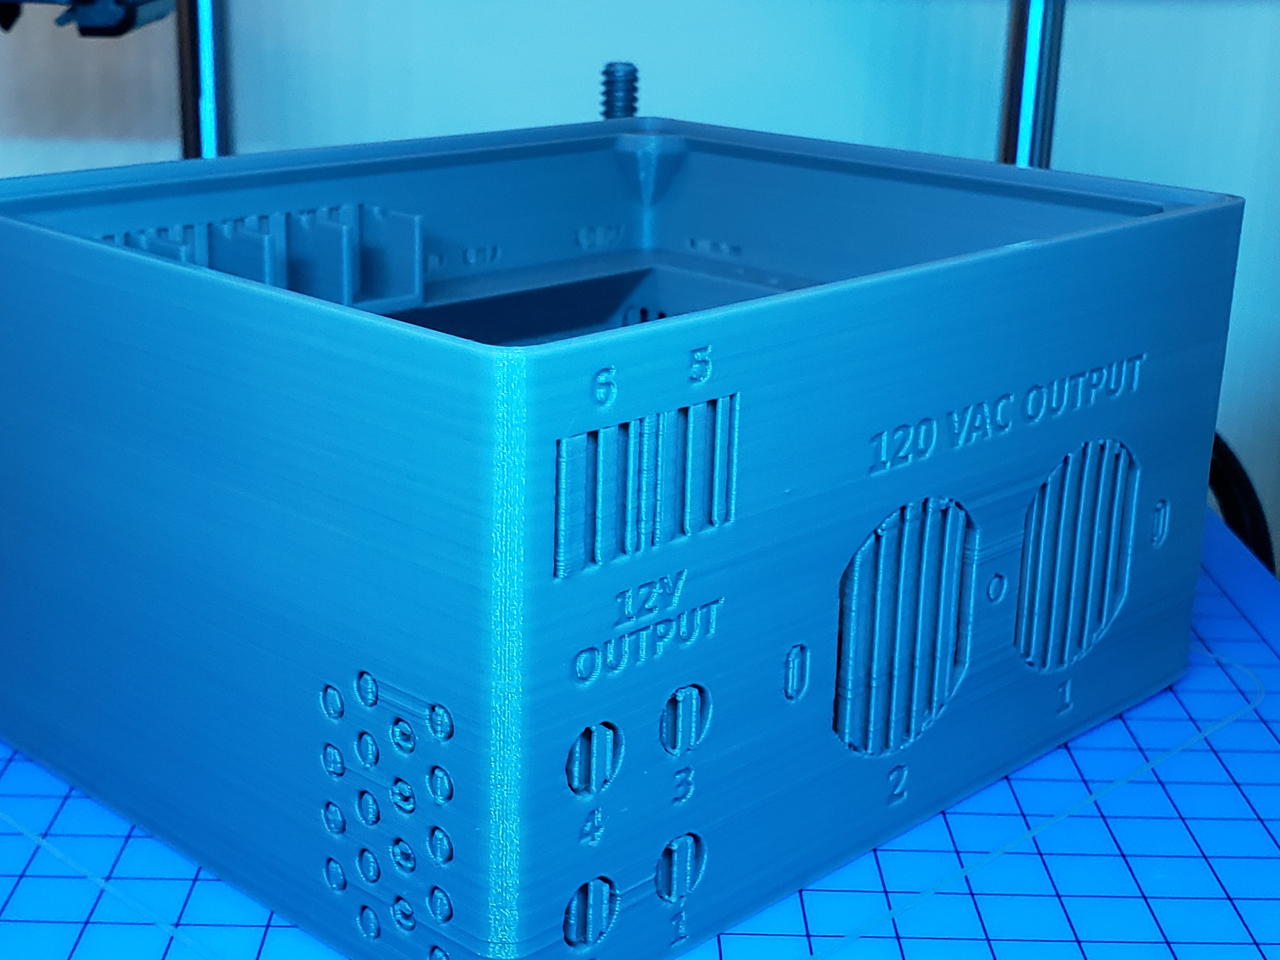
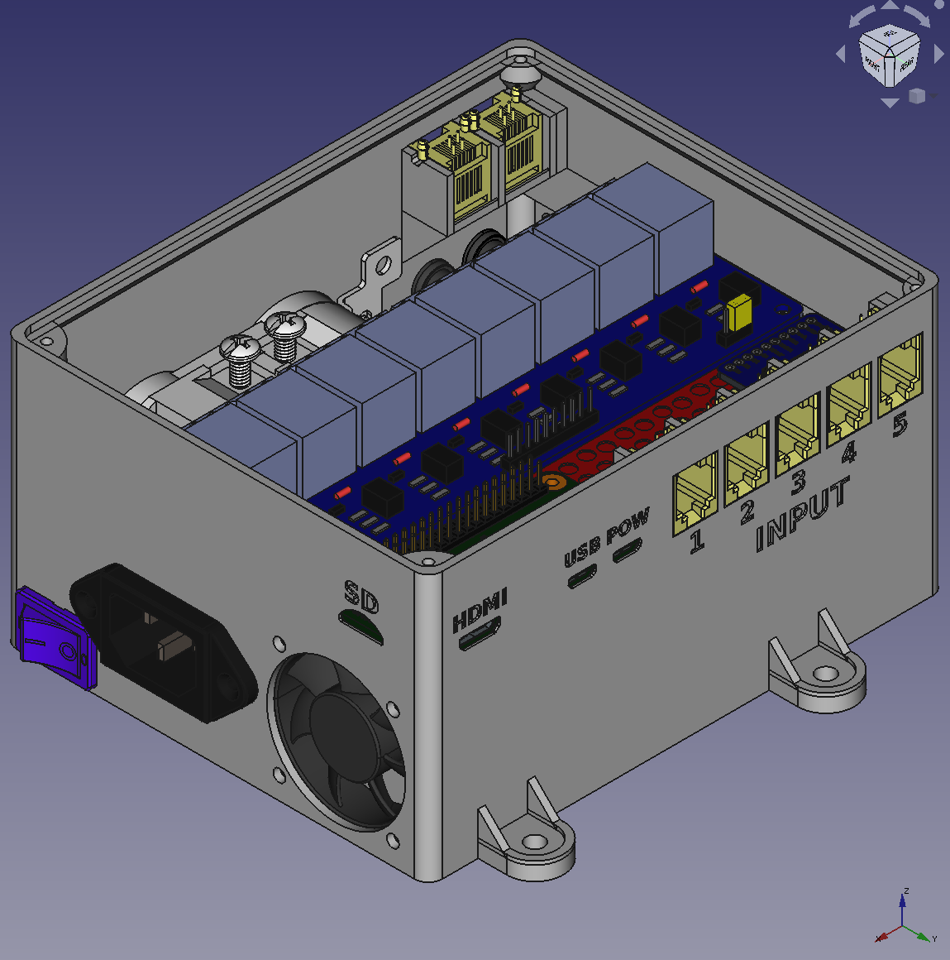
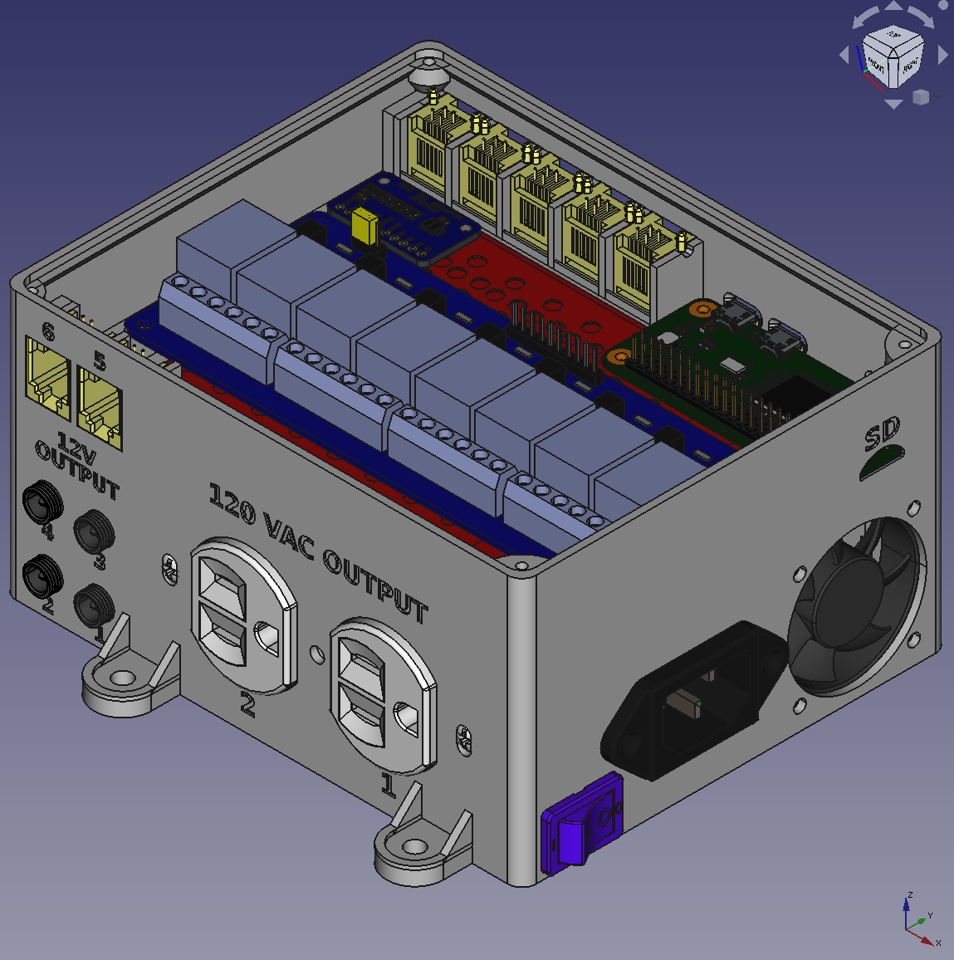
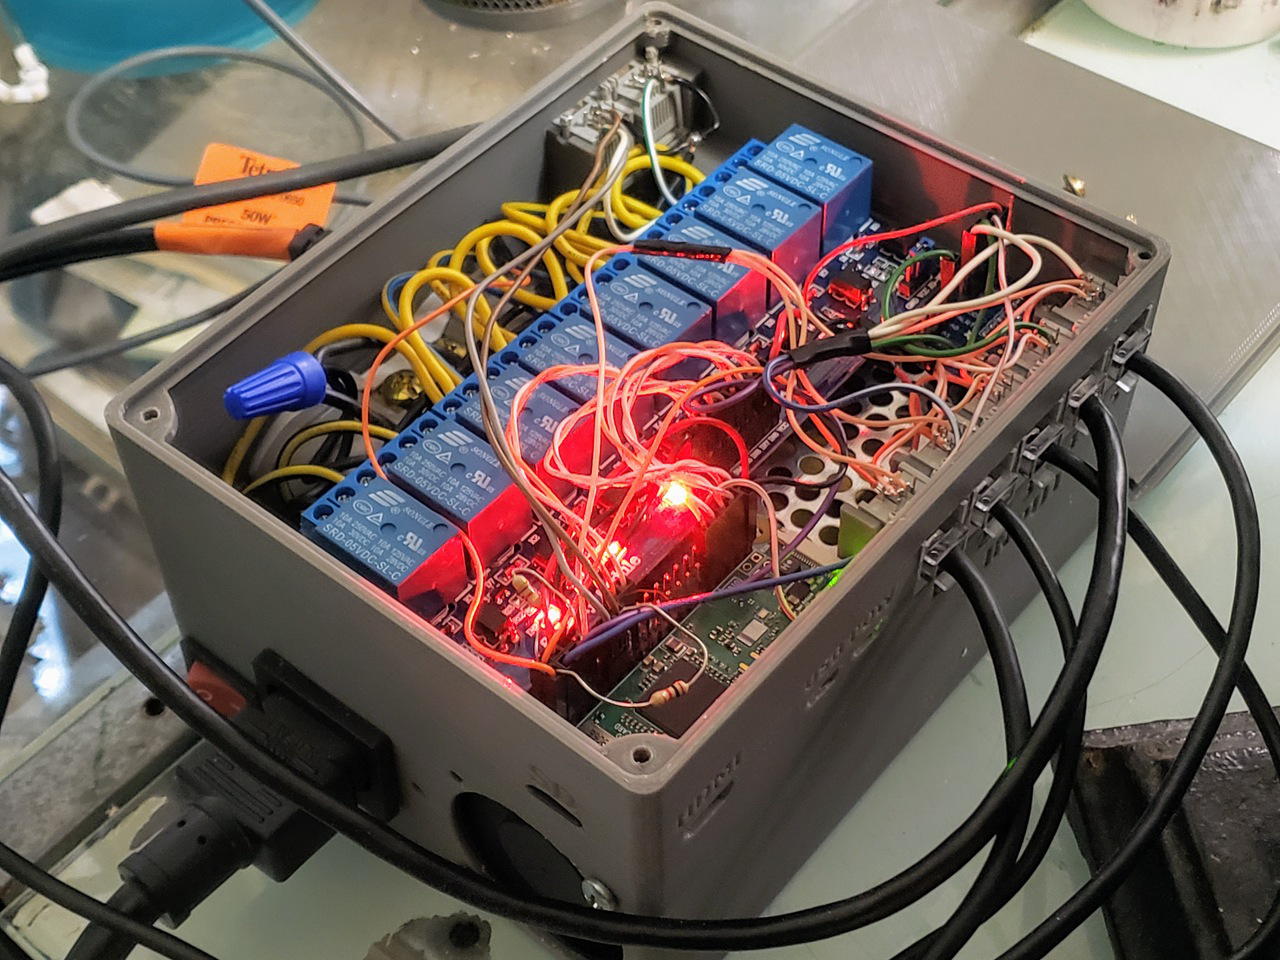
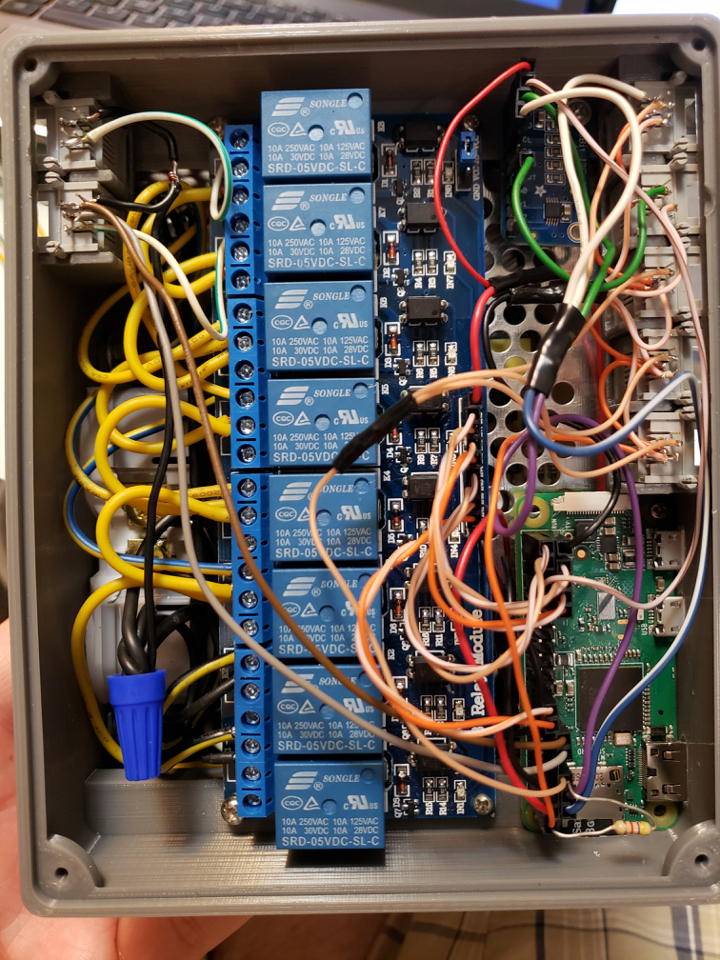
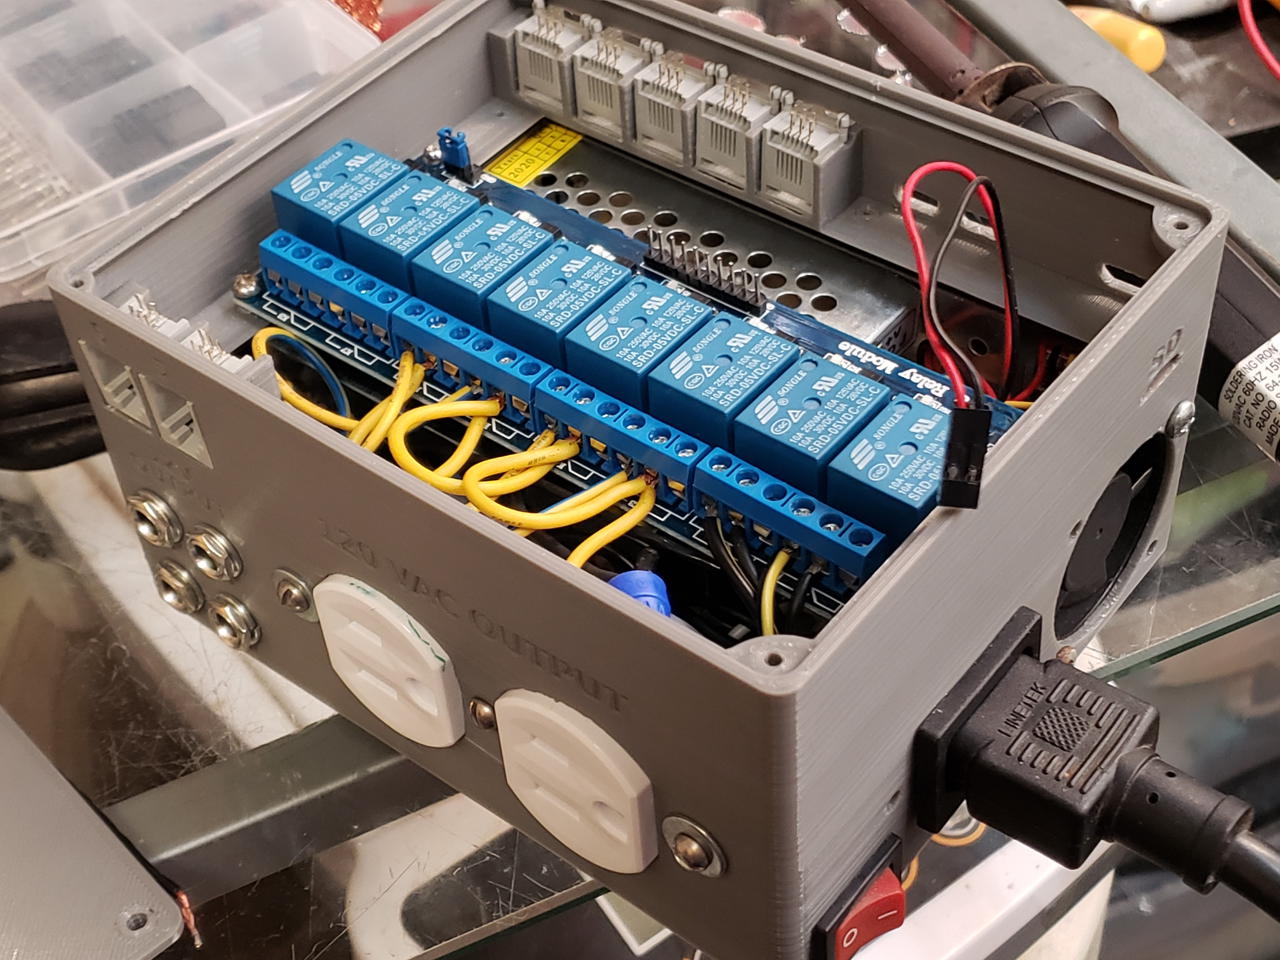
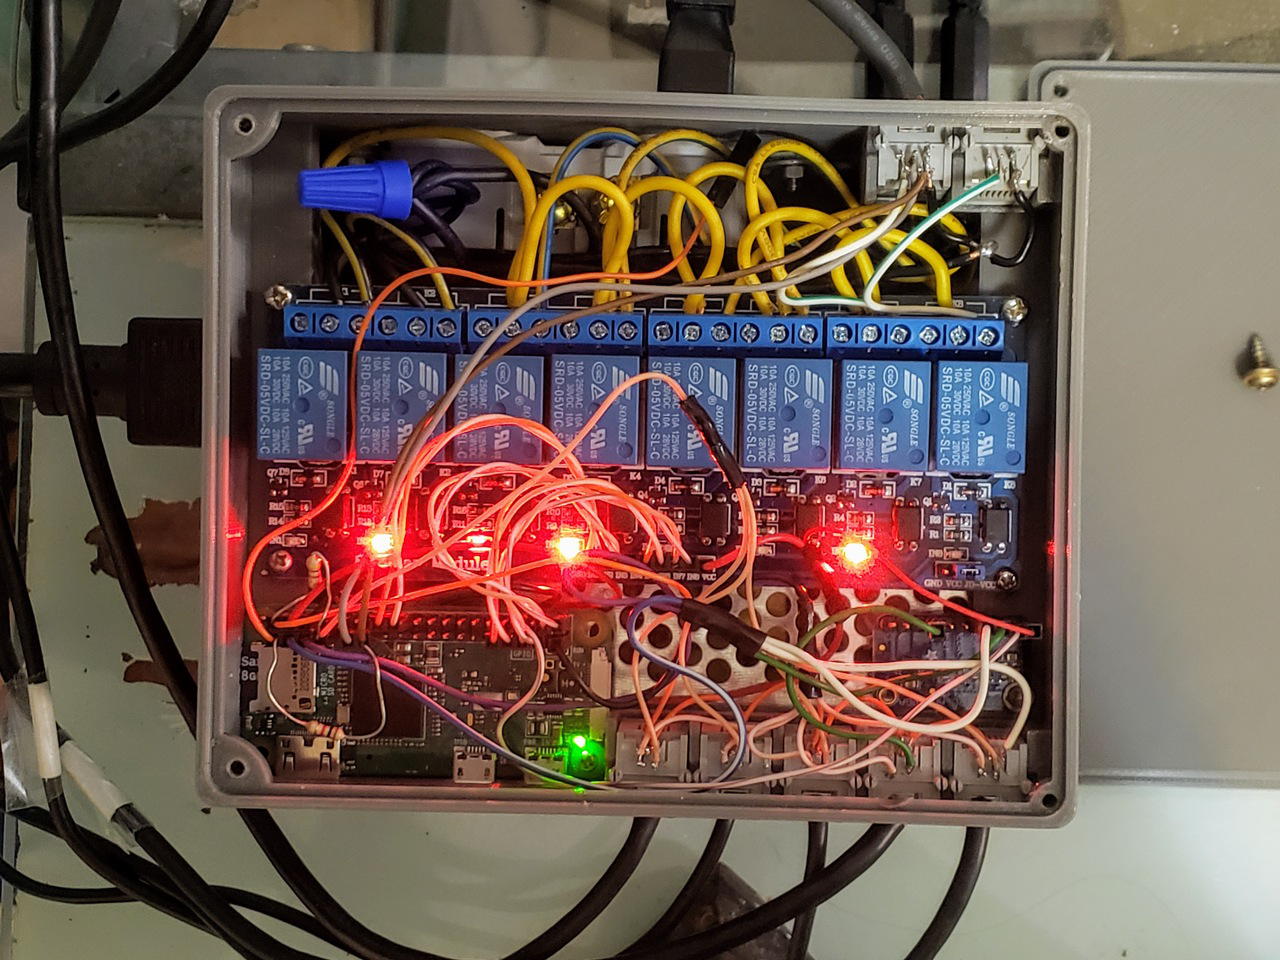
The system is controlled by a Raspberry Pi Zero W. An 8-channel relay board provides power to the (separable) 120V receptacle, four 12V barrel jacks, and two rj11 jacks. You can configure them however you wish, but they are labeled for your convenience.
The two rj11 jacks are useful for fan connections: a pair of wires for each positive and negative supply (for more current capacity), one for PWM, and one for tachometer.
I have included a mount point for an analog to digital converter (ADS1115) since the Zero does not have any analog pins. If you don’t have any analog peripherals, this isn’t necessary.
| Description | price | quantity | link |
|---|---|---|---|
| 12V, 5A power supply | $9 | 1 | https://www.ebay.com/itm/162284087100 |
| Raspberry Pi Zero W (with header) | $14 | 1 | https://www.adafruit.com/product/3708 |
| SD card | |||
| 8 channel relay board | 1 | ||
| ADS1115 breakout board (optional) | 1 | https://www.adafruit.com/product/1085 | |
| 120V receptacle | $3 | 1 | |
| 120v switch | |||
| 40mm fan | |||
| 5.5x2.1mm barrel jack | 4 | https://www.ebay.com/itm/174445832421 | |
| rj11 jack |
External
This will largely depend on your particular use-case. I will describe my own system as an example, but any sensor that works with a raspberry pi or ADC can be used.
| Description | price | quantity | link |
|---|---|---|---|
| DS18B20 temperature sensor | https://www.adafruit.com/product/374 | ||
| SEN0219 CO2 sensor | $50 | 1 | |
| AM2320 humidity/temperature sensor | $4 | 1 | https://www.adafruit.com/product/3721 |
| NMB-MAT 12V blower fan | $9 | 1 | https://www.ebay.com/itm/184426257531 |
| 12V water pump | $7 | 1 | |
| 5.5x2.1mm barrel plug | $0.25 | 4 | https://www.ebay.com/itm/224056638229 |
| rj11 plug | $0.10 | 7 | https://www.ebay.com/itm/183044368595 |
Connections
| Type | peripheral | caseID | BCM | Pi pin | interface |
|---|---|---|---|---|---|
| input | DS18B20 | INPUT1 | GPIO7 | 4 | 1-wire |
| input | DS18B20 | INPUT2 | GPIO7 | 4 | 1-wire |
| input | DS18B20 | INPUT3 | GPIO7 | 4 | 1-wire |
| input | AM2320 | INPUT4 | GPIO3,4 | 2,3 | I2C |
| input | fan tach | OUTPUT5 | GPIO27 | 13 | rpm (open-collector) |
| input | ADS1115 | internal | GPIO3,4 | 2,3 | I2C |
| output | relay1 | internal | GPIO23 | 16 | high/low |
| output | relay2 | internal | GPIO24 | 17 | high/low |
| output | relay3 | internal | GPIO20 | 38 | high/low |
| output | relay4 | internal | GPIO21 | 40 | high/low |
| output | relay5 | internal | GPIO6 | 31 | high/low |
| output | relay6 | internal | GPIO13 | 33 | high/low |
| output | relay7 | internal | GPIO19 | 35 | high/low |
| output | relay8 | internal | GPIO26 | 37 | high/low |
| output | fan speed | OUTPUT5 | GPIO17 | 11 | PWM |
Work Log
31 Mar 2021
For the ADS1115 + CO2 sensor:
- Gain 2 (=-2.048V)
04 Jan 2022
Photoacoustic CO2 sensors are the future. The Sensirion SCD41 (eval board) looks awesome and has way 12 pages of the datasheet devoted to communicating with the sensor.
14 Dec 2021
Well it works. Not perfectly.

10 Dec 2021
After following the manual calibration procedure, my sensor is reading 185ppm for outdoor air, which is impossible.
Calibrating the DFRobot SEN0219 0-5000ppm NDIR infrared sensor is a PITA. Their product page is not really helpful. Neither is the wiki.
You have to search through the 4-year old comment section to find anything of value:
No, we don’t have proof about the calibration, but because the sensor is set to auto calibrate mode, you can calibrate the sensor by run it in the fresh air for 24 hours.
The calibration of the sensor is based on the air it stays, where the fresh air has the CO2 concentration under 400ppm, and the sensor would calibrate itself as zero point if the concentration is under 400ppm. -DFRobot support
What does that mean? After calibration will it put out 0.0V?
what happens if I run the sensor more than 24 hours continuosly in an atmosphere of 800 ppm…will it recalibrate and asuming this value is 400ppm? -customer
Yes, the output would be wrong. -DFRobot Support
How is that a good idea? In what circumstance would you ever want your CO2 sensor to continuously calibrate to whatever environment you place it in?
Anyway… To the good stuff.
The baud rate:9600, 8 bit,1 stop,none parity, then the command: 0xFF 0x01 0x79 0x00/0xA0 0x00 0x00 0x00 0x00 checksum. Here 0xA0 is enable auto calibration, 0x00 is disable auto calibration.
to active it: 0xFF 0x01 0x79 0xA0 0x00 0x00 0x00 0x00 checksum
The Checksum is to add the byte together, and for turn on/off auto calibration, there is no return value.
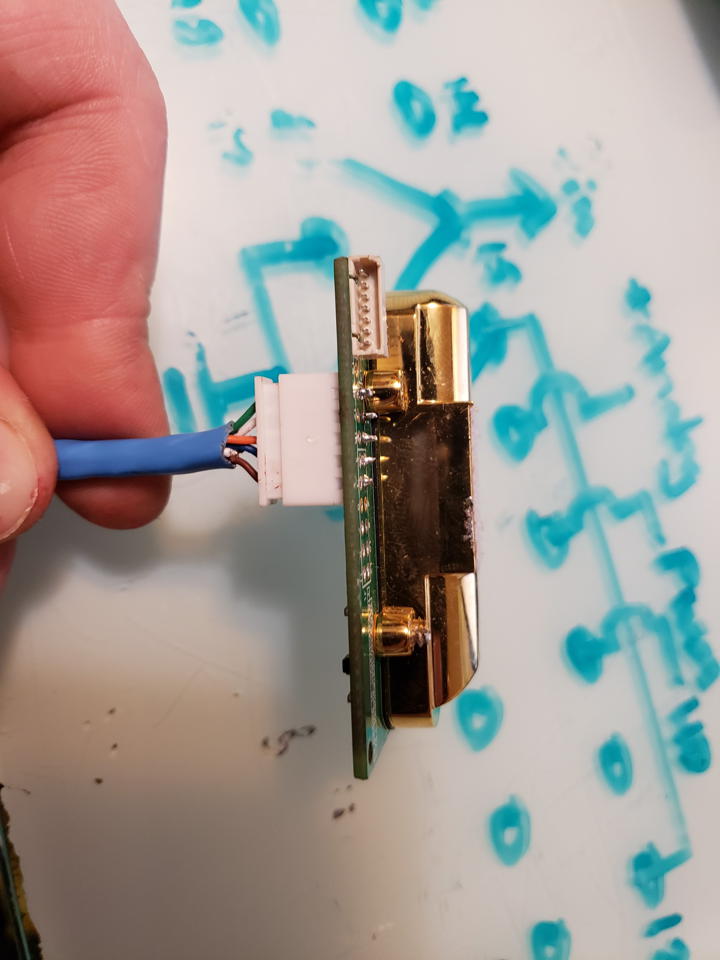
I completely removed the DFRobot hat and desoldered the header and attached my own. That was I could run a cable to the TX, RX, POW, GND, and ANALOG lines myself.
There is a datasheet for a different sensor that supposedly has the same UART transmission codes.
The core of the CO2 sensor is a STM32F051K8 arm MCU.
Commands contain 9 bytes. They always start with hex FF (b“” in python) followed by the default sensor number hex 01 (b“01” in python).
checksum = (invert (byte 1 +... + 7)) + 1
sudo pip3 install pyserialimport serial
ser = serial.Serial('/dev/ttyS0', baudrate=9600, parity=serial.PARITY_NONE, stopbits=serial.STOPBITS_ONE, bytesize=serial.EIGHTBITS, timeout=1)
read_CO2 = b"\xFF\x01\x86\x00\x00\x00\x00\x00\x79"
calibrate_zero = b"\xFF\x01\x87\x00\x00\x00\x00\x00\x78"
calibrate_span = b"\xFF\x01\x88\x00\x00\x00\x00\x00\x7A"
disable_auto_calibrate = b"\xFF\x01\x79\x00\x00\x00\x00\x00\x86"
enable_auto_calibrate = b"\xFF\x01\x79\xA0\x00\x00\x00\x00\xE6"
def get_CO2():
ser.write(read_CO2)
for h in range(9):
val = int(ser.read(1),0)
if h == 2:
high = val
if h == 3:
low = val
co2 = high * 256 + low
return co2Unfortunately, this didn’t work at all for me. No response on the serial connection. I have no idea what I am doing wrong (or right for that matter). I guess I’ll just have to stick with analog and never buy from DFRobot again.
09 Dec 2021
Scooped a Pi zero W2. Woot.
31 Oct 2021
I had to add IPQoS cs0 cs0 to the end of /etc/ssh/sshd_config to stop the constant freezing of my ssh connection to the Zero. This did not happen with my other Zero, although I haven’t tried it since I upgraded my router. ssh manpage: IPQoS
30 Oct 2021
Finally getting around to documentation while I am setting up a germination chamber.
20 Aug 2021
Page created. Project ongoing.